
G6 Guitar Chord | How to play the G Sixth Chord
Welcome to our tutorial on the G 6 chord, an intriguing member of the Major Chords family. This chord, composed of the notes G, B, D, and E, offers a unique sound that adds depth and complexity to your music. The intervals that form this chord are 1 (Root), 3 (Major Third), 5 (Perfect Fifth), and 6 (Major Sixth), each contributing to its distinctive tonal quality.
Understanding the music intervals that make up this chord is crucial for mastering its construction and usage. If you need a refresher on this topic, our tutorial about fretboard intervals is a great place to start. You can also explore our tutorial on how to denote chords based on their composing intervals.
The G 6 chord belongs to the broader category of sixth (6) guitar chords. To delve deeper into this chord family, we recommend our comprehensive tutorial about sixth guitar chords.
Learning to play the G 6 chord involves understanding chord diagrams and fretboard patterns that show the tones composing the chord. If you're new to this, our full tutorial about guitar chords of all types is an excellent resource to help you get started.
This tutorial is more than just a lesson on a single chord. It's a step towards mastering the guitar's harmonic language. So grab your guitar, and let's dive into the world of the G 6 chord!
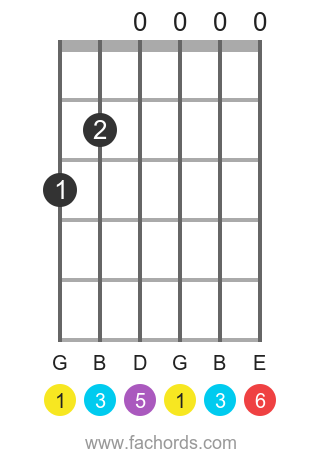
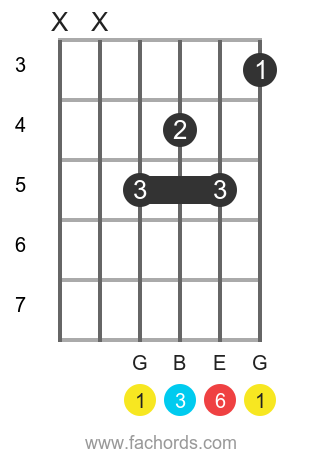
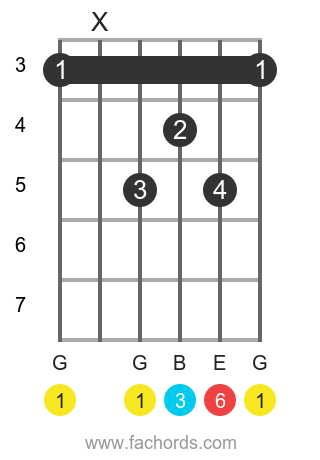
G 6 chord Notes:
GBDE
How to create the Major Sixth chord:
G Major Sixth Guitar Chord Fingers Positions
Chord boxes are sorted from the easiest to the hardest. Learn how to read chord diagrams.
If you have difficulties with bar chord shapes, check the Bar Chords Tips tutorial.
You can also use this accessible chords page with written diagrams instruction.
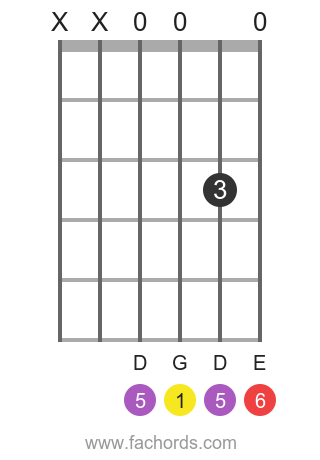
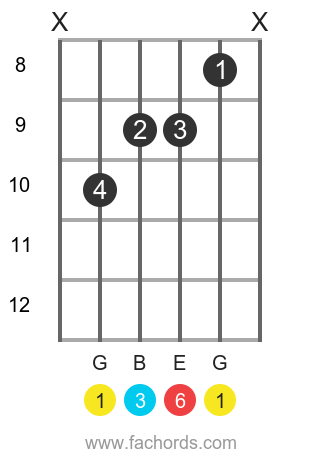
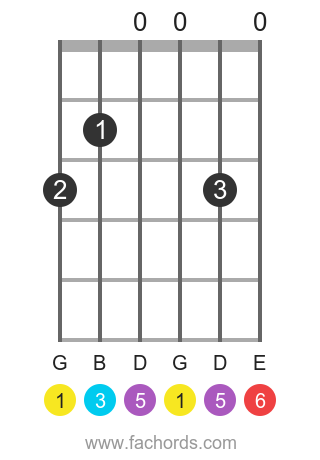
Position 1
Open
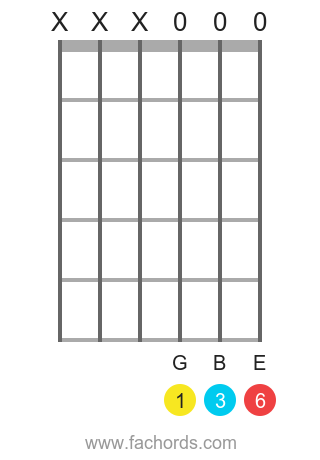
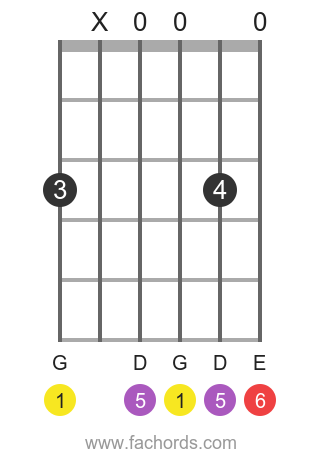
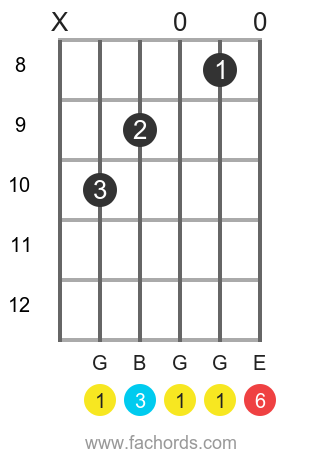
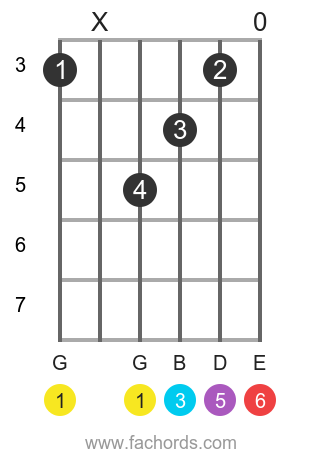
Position 2
Movable
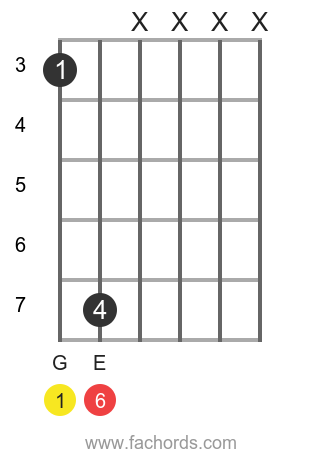
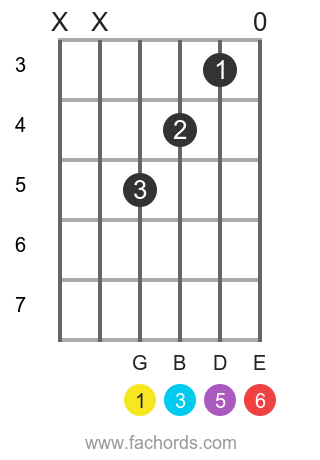
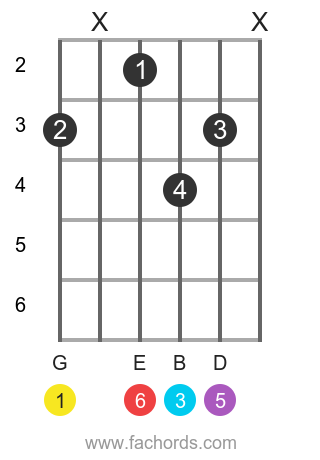
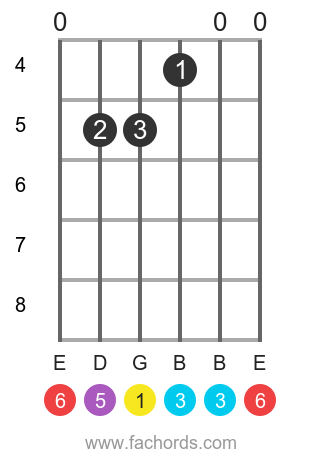
Position 3
Open
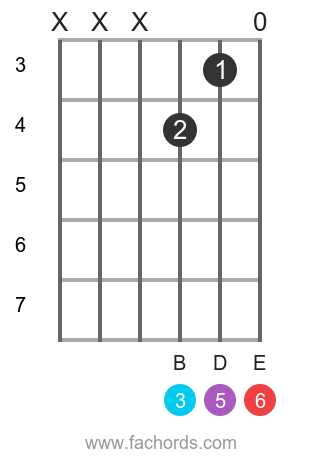
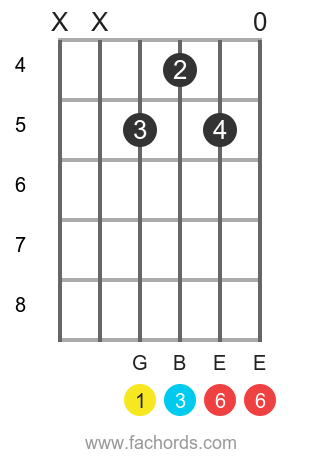
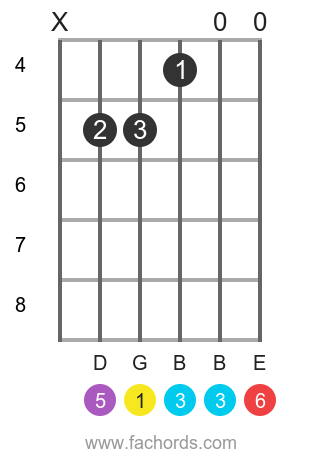
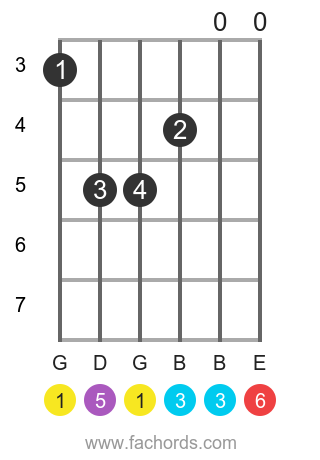
Position 4
Open
Position 5
Open
Position 6
Open
Position 7
Open
Position 8
Open
Position 9
Movable
Position 10
Open
Position 11
Movable
Position 12
Open
Position 13
Open
Position 14
Open
Position 15
Open
Position 16
Open
Position 17
BarreMovable
Position 18
BarreMovable
 You can find more shapes in our all guitar chords online library. If you prefer a printable pdf, download
the Free Guitar Chords Chart Pdf
You can find more shapes in our all guitar chords online library. If you prefer a printable pdf, download
the Free Guitar Chords Chart Pdf
Play This Chord With Other Roots
C 6 | D 6 | E 6 | F 6 | G 6 | A 6 | B 6 | C#6 | D#6 | F#6 | G#6 | A#6 | Ab6 | Bb6 | Db6 | Eb6 | Gb6
G 6 guitar chord: fretboard map of the intervals
You can create any fingering you like on any part of the fretboard, just play some of the chord tones shown in the map below.